你好,單元測試 | 單元測試的藝術 第 3 版 | 閱讀筆記
10 Apr 2024「單元測試的藝術」讀書會 - 你好,單元測試 (The Art of Unit Testing, 3e - A First Unit Test) 閱讀筆記。本文包含:測試結構與命名規範、拋出與捕捉錯誤、移除重複的程式碼、快照難以聚焦問題所在、分類測試。
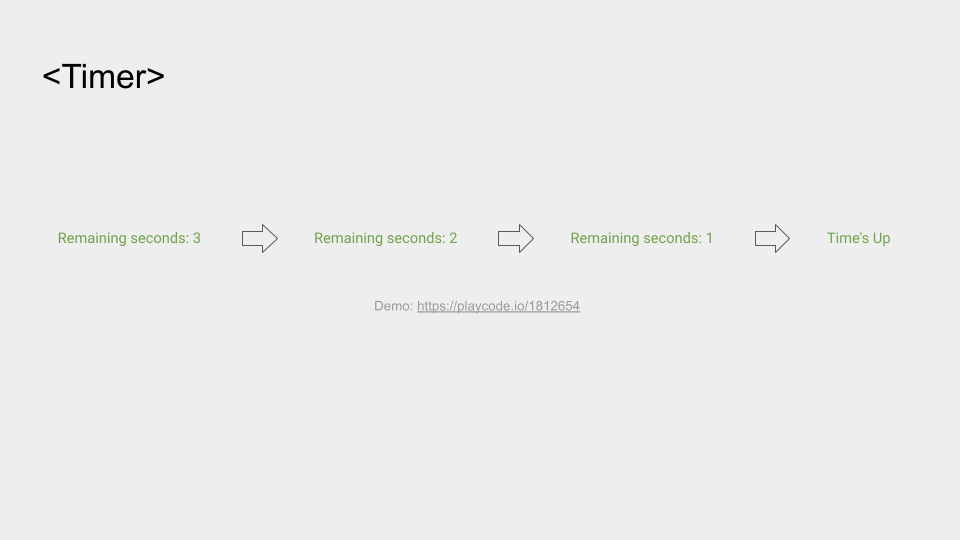
計時器
從看個實際範例開始 (✪ω✪) 如下程式碼所示,計時器 <Timer> component 會接收一個 waitTime 的 prop,並且在 waitTime 秒數結束後顯示提示訊息。本文接下來的說明主要都會以此 component 與其測試為例。
const Timer = ({ waitTime = 3 }) => {
  const [seconds, setSeconds] = useState(waitTime);
  const intervalIDRef = useRef(null);

  const startTimer = useCallback(() => {
    if (waitTime <= 0) {
      throw new Error('waitTime must be greater than 0.');
    }

    intervalIDRef.current = setInterval(
      () => setSeconds((prev) => prev - 1),
      timerTickInterval // timerTickInterval is a constant value 1000
    );
  }, []);

  const stopTimer = useCallback(() => {
    clearInterval(intervalIDRef.current);
    intervalIDRef.current = null;
  }, []);

  useEffect(() => {
    startTimer();
    return () => clearInterval(intervalIDRef.current);
  }, []);

  useEffect(() => {
    if (seconds === 0) {
      stopTimer();
    }
  }, [seconds]);

  return (
    <div>{seconds === 0 ? `Time\'s Up` : `Remaining seconds: ${seconds}`}</div>
  );
};
點此看 demo。
實作測試如下,在這裡使用 Jest 和 React Testing Library 來撰寫測試程式。在測試程式中,利用 jest.useFakeTimers 來模擬時間,並且使用 jest.advanceTimersByTime 來前進時間,以便測試 <Timer> component 的行為。最後,使用 jest.useRealTimers 來還原真實時間。
在這段測試程式碼中,分為兩個情境來測試 <Timer> component:
- 情境 1:
waitTime是大於或等於 0 的整數。 - 情境 2:
waitTime是小於 0 的整數。
在情境 1 中,測試 waitTime 為 3 秒時,經過 1 秒後是否顯示剩下 2 秒的提示訊息;經過 3 秒後是否顯示 Time\'s Up 的提示訊息;在元件即將移除時是否清除計時器。在情境 2 中,測試 waitTime 為 -1 時是否拋出錯誤。
describe('Timer component', () => {
  beforeAll(() => {
    jest.useFakeTimers();
  });

  afterAll(() => {
    jest.useRealTimers();
  });

  const advanceTimersByTime = (time) => {
    act(() => {
      jest.advanceTimersByTime(time);
    });
  };

  describe('waitTime is provided with integer greater than or equal to zero', () => {
    let timerComponent;
    const renderTimerComponent = (props) => render(<Timer {...props} />);

    beforeEach(() => {
      timerComponent = renderTimerComponent({ waitTime: 3 });
    });

    // 經過 1 秒後是否顯示剩下 2 秒的提示訊息
    it('should show remaining 2 seconds when after 1 second', () => {
      const { getByText } = timerComponent;

      advanceTimersByTime(1000);

      expect(getByText('Remaining seconds: 2')).toBeInTheDocument();
    });

    // 經過 3 秒後是否顯示 Time's Up 的提示訊息
    it(`should show Time\'s Up when after 3 seconds`() => {
      const { getByText } = timerComponent;

      advanceTimersByTime(3000);

      expect(getByText(`Time\'s Up`)).toBeInTheDocument();
    });

    // 在元件即將移除時是否清除計時器
    it('cleans up the timer on unmount', () => {
      const { unmount } = timerComponent;
      const spyOnClearInterval = jest.spyOn(global, 'clearInterval');

      unmount();

      expect(spyOnClearInterval).toHaveBeenCalledTimes(1);
    });
  });

  describe('when waitTime is provided with negative integer', () => {
    // 測試 `waitTime` 為 -1 時是否拋出錯誤
    it('should throws exception with error message when waitTime is -1', () => {
      // 稍後改用 toThrowError
      try {
        render(<Timer waitTime={-1} />);
      } catch (e) {
        expect(e.message).toContain('waitTime must be greater than 0.');
      }
    });
  });
});
測試結構與命名規範
目的:
- 好的結構要能適當組織測試,讓測試程式好懂、好維護。
- 好的命名模式要能清楚表達測試目的、要做什麼和預期結果,當錯誤發生時,不用查 code,從訊息即可初步確認問題方向。
說明:
- 利用
describe組織測試,以及it或test區隔單一 test case。 -
describe可用來組織巢狀測試,作為說明測試目標與區隔情境的用途。例如,以下結構在第一層的describe表示 unit of work 是<Timer>component,並在第二層的describe區分為兩個情境:(1)waitTime是大於或等於 0 的整數,與 (2)waitTime是小於 0 的整數。雖然目前對元件寫測試多是測試行為與表現,但若是重要的功能或核心邏輯,這樣測試實作細節的方式是無可避免的,可斟酌評估、適量使用。describe('Timer component', () => { describe('waitTime is provided with integer greater than or equal to zero', () => { // 略 ... }); describe('when waitTime is provided with negative integer', () => { // 略 ... }); }); -
在撰寫描述方面,利用
it should作為測試命名模式。例如,should show remaining 2 seconds when after 1 second表示此測試在經過 1 秒後 (要做什麼),預期得到提示剩下 2 秒的訊息 (預期結果)。it('should show remaining 2 seconds when after 1 second', () => { // Arrange const { getByText } = timerComponent; // Act advanceTimersByTime(1000); // Assert expect(getByText('Remaining seconds: 2')).toBeInTheDocument(); }); - 在實作測試程式方面,搭配 3A Pattern - Arrange 表示「設定」、Act 表示「操作」、Assert 表示「驗證」,讓測試程式更為結構化、清晰好懂,並且容易理解整體流程,有助維護程式碼的模組化、維持風格的一制性,便於除錯與維護 (如上例)。
-
利用 USE naming (unit under test / scenario / expectation) 撰寫描述,舉例如下:
- The unit of work under test -
<Timer>component - The scenario or inputs to the unit
- scenario 是
waitTime is provided with integer greater than or equal to zero或when waitTime is provided with negative integer - input 是
waitTime
- scenario 是
- The expected behavior or exit point - 顯示的提示訊息,例如:
Time\'s Up或Remaining seconds: 2
it('Timer component, given waitTime for 3 seconds and after 1 second, show Remaining seconds: 2', () => {
  // 略 ...
});
相較 USE,我偏好巢狀 +
it should的命名模式,這是因為在分層結構中,訊息不會太長、一目了然,並且能在出錯時很快看出執行的動作與預期結果,盡快找出問題。 - The unit of work under test -
拋出與捕捉錯誤
在 <Timer> component 中,如果傳入的 waitTime 小於 0,由於這個情況是不合法的,無法順利倒數時間,因此會拋出錯誤。
if (waitTime <= 0) {
  throw new Error('waitTime must be greater than 0.');
}
在測試中透過 try...catch 來捕捉錯誤,並且驗證錯誤訊息是否符合預期。
describe('when waitTime is provided with negative integer', () => {
  it('should throw exception with error message when waitTime is -1', () => {
    try {
      render(<Timer waitTime={-1} />);
    } catch (e) {
      expect(e.message).toContain('waitTime must be greater than 0.');
    }
  });
});
try...catch 看起來有點冗長,Jest 提供 toThrowError 來簡化這個過程。我滿喜歡這個解法的,除了少寫一些程式碼、讓測試更為簡潔之外,這樣的表示方式也讓測試更容易閱讀和維護。
describe('when waitTime is provided with negative integer', () => {
  it('should throws exception with error message when waitTime is -1', () => {
    expect(() => render(<Timer waitTime={-1} />)).toThrowError(
      'waitTime must be greater than 0.'
    );
  });
});
拋出錯誤 vs 測試失敗
比較「拋出錯誤」與「測試失敗」的差異。
| - | 使用情境 | 優點 | 缺點 |
|---|---|---|---|
| 拋出錯誤 | 實作含有拋出錯誤的功能 | 能包含例外處理 | 測試實作細節,缺乏彈性 |
| 測試失敗 | 功能不符合預期的行為與表現 | 檢測核心邏輯 | - |
移除重複的程式碼
在精簡程式碼方面,可以考慮以下作法:(1) 利用 before* and after* hook,(2) 實作 factory method 或稱為 helper function,以及 (3) parameterized test 來減少重複的程式碼。
before* and after* Hook
在實作測試時,我們常遇到需要在進行測試前做一些準備工作,並且在測試結束後做一些收尾與清理,這時可以先整理好是否為重複設定或一次性的工作,再分別使用 before* and after* hook 來包裝,以確保測試環境的一致性和安全性,避免 flaky test,並且提高測試效率:
-
beforeEach和afterEach適合用在重複設定。例如:測試元件時,可以在每個 test case 開始前渲染該元件以及其初始狀態,並且在每個 test case 結束時移除元件、清除或恢復預設值。beforeEach(() => { timerComponent = renderTimerComponent({ waitTime: 3 }); }); -
beforeAll和afterAll適合用在一次性設定。例如:利用beforeAll和afterAll來設定和還原jest.useFakeTimers和jest.useRealTimers,就不用在每個 test suite 都實作此設定。beforeAll(() => { jest.useFakeTimers(); }); afterAll(() => { jest.useRealTimers(); });但
before*andafter*hook 可能會造成開發者在閱讀程式碼時需在不同區塊間跳躍的困擾,而干擾思考與實作邏輯的不連貫,可改用 factory method 來處理,讓測試更容易閱讀和維護。
Factory Method / Helper Function
實作 factory method 或稱為 helper function 能用來減少重複的程式碼。例如:實作 advanceTimersByTime 來包含模擬時間前進的程式碼區塊,這樣可以讓測試更容易閱讀和維護。
const advanceTimersByTime = (time) => {
  act(() => {
    jest.advanceTimersByTime(time);
  });
};
advanceTimersByTime(input * 1000);
然而,helper function 真的好用嗎?在我的實務經驗上,如果程式碼夠簡單易懂,是不用 helper function,helper function 反而會造成誤解而必須查閱。舉例如下,givenToday 與 shouldBeValentinesDay 是 helper function,這兩個 function 用來設定今天的日期與驗證是否為情人節,照理說可以讓測試更容易閱讀和維護,但也許不知情的開發者無法理解這兩個 function 的用途,因此可能會造成查閱的問題,還不如直接寫在測試程式中簡單易懂 (更多說明)。總結來說,重構與精簡程式碼應優先考量「可讀性」。
重構前:
describe('今天是情人節嗎?', function () {
  let holiday = null;
  let mockGetToday = null;

  beforeEach(() => {
    holiday = new Holiday();
    mockGetToday = jest.fn();
    holiday.getToday = mockGetToday;
  });

  it('今天是情人節 2/14', () => {
    mockGetToday.mockReturnValue(new Date('2024/02/14'));
    expect(res).toBe('情人節快樂');
  });

  it('今天不是是情人節 4/14', () => {
    mockGetToday.mockReturnValue(new Date('2024/04/14'));
    expect(res).toBe('今天不是情人節');
  });
});
重構後:
describe('今天是情人節嗎?', function () {
  let holiday = null;
  let mockGetToday = null;

  beforeEach(() => {
    holiday = new Holiday();
    mockGetToday = jest.fn();
    holiday.getToday = mockGetToday;
  });

  it('今天是情人節 2/14', () => {
    givenToday('2021-02-14');
    shouldBeValentinesDay(holiday.checkValentinesDay());
  });

  it('今天不是是情人節 4/14', () => {
    givenToday('2024/04/14');
    shouldNotBeValentinesDay(holiday.checkValentinesDay());
  });

  const givenToday = (today) => mockGetToday.mockReturnValue(new Date(today));

  const shouldBeValentinesDay = (res) => {
    expect(res).toBe('情人節快樂');
  };

  const shouldNotBeValentinesDay = (res) => {
    expect(res).toBe('今天不是情人節');
  };
});
因此,我多用 before* and after* hook 而少用 helper function,除非程式碼太複雜或重複性太高,才會考慮使用 helper function。
Parameterized Test
parameterized test (參數化測試程式) 可用 test.each 或 it.each 來實現,以避免相似的測試所造成的重複程式碼的問題,但可能會因為錯誤訊息太通用,而有可讀性的問題。舉例來說,以下是一個參數化測試程式,測試 <Timer> component 在不同的 waitTime 下是否能正確顯示提示訊息。注意,實作 parameterized test 時,要區分不同的測試情境,例如:waitTime 為 3 或 -1 在使用的情境和意義就是不同的 (合法 vs 不合法的時間),區分開來會更容易除錯,千萬不要一股腦通通塞進同一個陣列裡。
test.each([5, 1])(
  `should show Time's Up when after different waitTime`,
  (input) => {
    const { getByText } = render(<Timer waitTime={input} />);

    advanceTimersByTime(input * 1000);

    expect(getByText(`Time\'s Up`)).toBeInTheDocument();
  }
);
快照難以聚焦問題所在
snapshot 的測試包含太多實作細節,導致出錯時難以立即確認問題所在。常見的問題如對特定元件做快照,但出錯時很難馬上確認是哪裡出了問題,像是:某個屬性改名、class name 改變、或是元件結構改變等。
解法:
-
利用
toMatchInlineSnapshot縮小快照比對的範圍。舉例如下,原本的測試是檢測指定訊息是否存在,接著改用toMatchInlineSnapshot來測試提示訊息。比起將整個<Timer>做快照,toMatchInlineSnapshot可以只對特定部份元件做快照就縮小了比對範圍,試圖聚焦問題所在。但這樣的作法還是包含太多實作細節,因此我大多會用選取元素 (例如:getByTestId與data-test-id) 確認這個包含提示訊息的元素是否存在,而非直接比對文字本身,來保有專注性與彈性。原本的測試。
it('should show remaining 2 seconds when after 1 second', () => {
  const { getByText } = timerComponent;

  advanceTimersByTime(1000);

  expect(getByText('Remaining seconds: 2')).toBeInTheDocument();
});
改用
toMatchInlineSnapshot測試提示訊息。it('should show remaining 2 seconds when after 1 second', () => { const { getByText } = timerComponent; advanceTimersByTime(1000); expect(getByText(`Remaining seconds: 2`)).toMatchInlineSnapshot(` <div> Remaining seconds: 2 </div> `); });建議改用
getByTestId與data-test-id確認這個包含提示訊息的元素是否存在,而非直接比對文字本身,來保有專注性與彈性。改寫
<Timer>元件。<div> {seconds === 0 ? ( `Time\'s Up` ) : ( <> Remaining seconds: <div data-test-id="remaining-seconds">${seconds}</div> </> )} </div>改寫測試。
expect(getByTestId('remaining-seconds')).toHaveTextContent('2'); -
利用 shallow rendering 減少快照包含的實作細節,如測試條件渲染下會出現哪些元件 (尤其是在測試 layout 的狀況),而非元件的內部狀況。這同樣也是縮小快照比對的範圍的一種方式。
<React.Fragment>
  <CounterValue count="{0}" />
  <DecrementButton onClick="{[Function]}" />
  <IncrementButton onClick="{[Function]}" />
</React.Fragment>
False Positive
既然提到彈性,就不得不聊聊 false positive。false positive 是指測試錯誤地報告了一個問題,即使實際上沒有問題。這可能是因為測試本身有問題,或者是因為測試環境或測試資料有問題。false positive 可能會導致不必要的工作或混淆。
舉例來說,以下兩段測試程式都是在確認訊息是否正確 (在意義上是要確認一樣的目標),但是第一段測試程式使用 toContain,第二段測試程式使用 toBe,這兩者的差異在於 toContain 會比對字串是否包含特定字串,而 toBe 會比對字串是否完全相同。若錯誤訊息稍作修改呢,如加上或移除句點?在本質上並沒有太大差別,但就會因為這樣的比對差異,造成第二段測試程式失敗而報錯,這就是由於測試本身有問題而導致 false positive 的情況。
expect(e.message).toContain('waitTime must be greater than 0');
expect(e.message).toBe('waitTime must be greater than 0');
分類測試
Jest 無法直接對測試做分類,但可以用 (1) 帶入參數 --testPathPattern 或 (2) 建立不同的設定檔來達成。
帶入參數 --testPathPattern
舉例來說,帶入 --testPathPattern="Timer(\.test|\.refactor\.test)\.js$" 表示 Timer.test.js 與 Timer.refactor.test.js 都符合條件。
yarn test --testPathPattern=Timer\.test\.js$
得到結果,確定執行兩支檔案。
PASS  src/Timer/Timer.test.js
PASS  src/Timer/Timer.refactor.test.js

...

Test Suites: 2 passed, 2 total
其他相似的解法還有:
- 指定要執行特定資料夾或檔案名稱規則的測試檔案,例如:
jest folder-name。 - 指定部份檔名。例如,
jest hello就會執行hello資料夾底下或檔名出現 hello 字串的測試檔案。
建立不同的設定檔
舉例來說,jest.config 是預設的設定檔,jest.config.integration.js 是整合測試的設定檔,jest.config.unit.js 是單元測試的設定檔。針對不同測試環境,可執行不同的前置指令,而針對不同的前置指令會帶入不同的設定檔,因此可分別執行帶有 integration 或 unit 字串的測試檔案,作為分類測試的解法。
// jest.config.integration.js
var config = require('./jest.config');
config.testRegex = 'integration\\.js$';
module.exports = config;

// jest.config.unit.js
var config = require('./jest.config');
config.testRegex = 'unit\\.js$';
module.exports = config;
執行測試的前置指令。
// package.json
"scripts": {
  "unit": "jest -c jest.config.unit.js",
  "integration": "jest -c jest.config.integration.js"
}
依照不同的測試需求選用不同的前置指令,例如:yarn unit 或 yarn integration。
")
")


